UniTS VPN with FortiClient
This page guides you through installing and configuring the FortiClient client to connect to the VPN of the University of Trieste. On desktop, the installation package already includes the University’s configuration; on mobile, the configuration must be entered manually.
Credentials: for all operating systems, access uses the username in the format <username>@ds.units.it and the corresponding institutional password.
Connection parameters (required on mobile and Linux):
- Type: SSL-VPN
- Server:
vpn.units.it - Port:
443
Windows
📥 Download: FortiClient Windows 64-bit (.exe installer)
The package already includes the configuration for the University of Trieste. It is available only for x64 architecture: Windows ARM devices are not supported by the standard installer. For alternatives, contact rete@units.it.
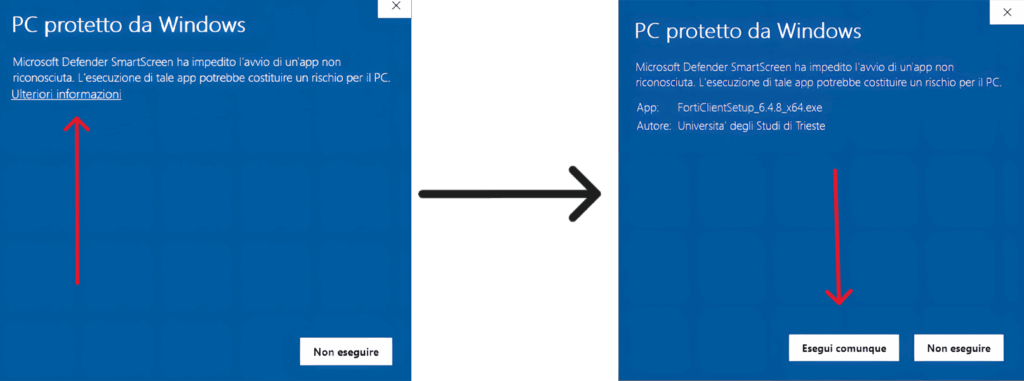
Download and run the installer. If Windows SmartScreen blocks execution, click “More info” and then “Run anyway”: the software is distributed directly by the University.
After installation, open FortiClient and go to Remote Access. The UniTS VPN connection will already be present: select it, enter your credentials in the format <username>@ds.units.it, and click Connect.
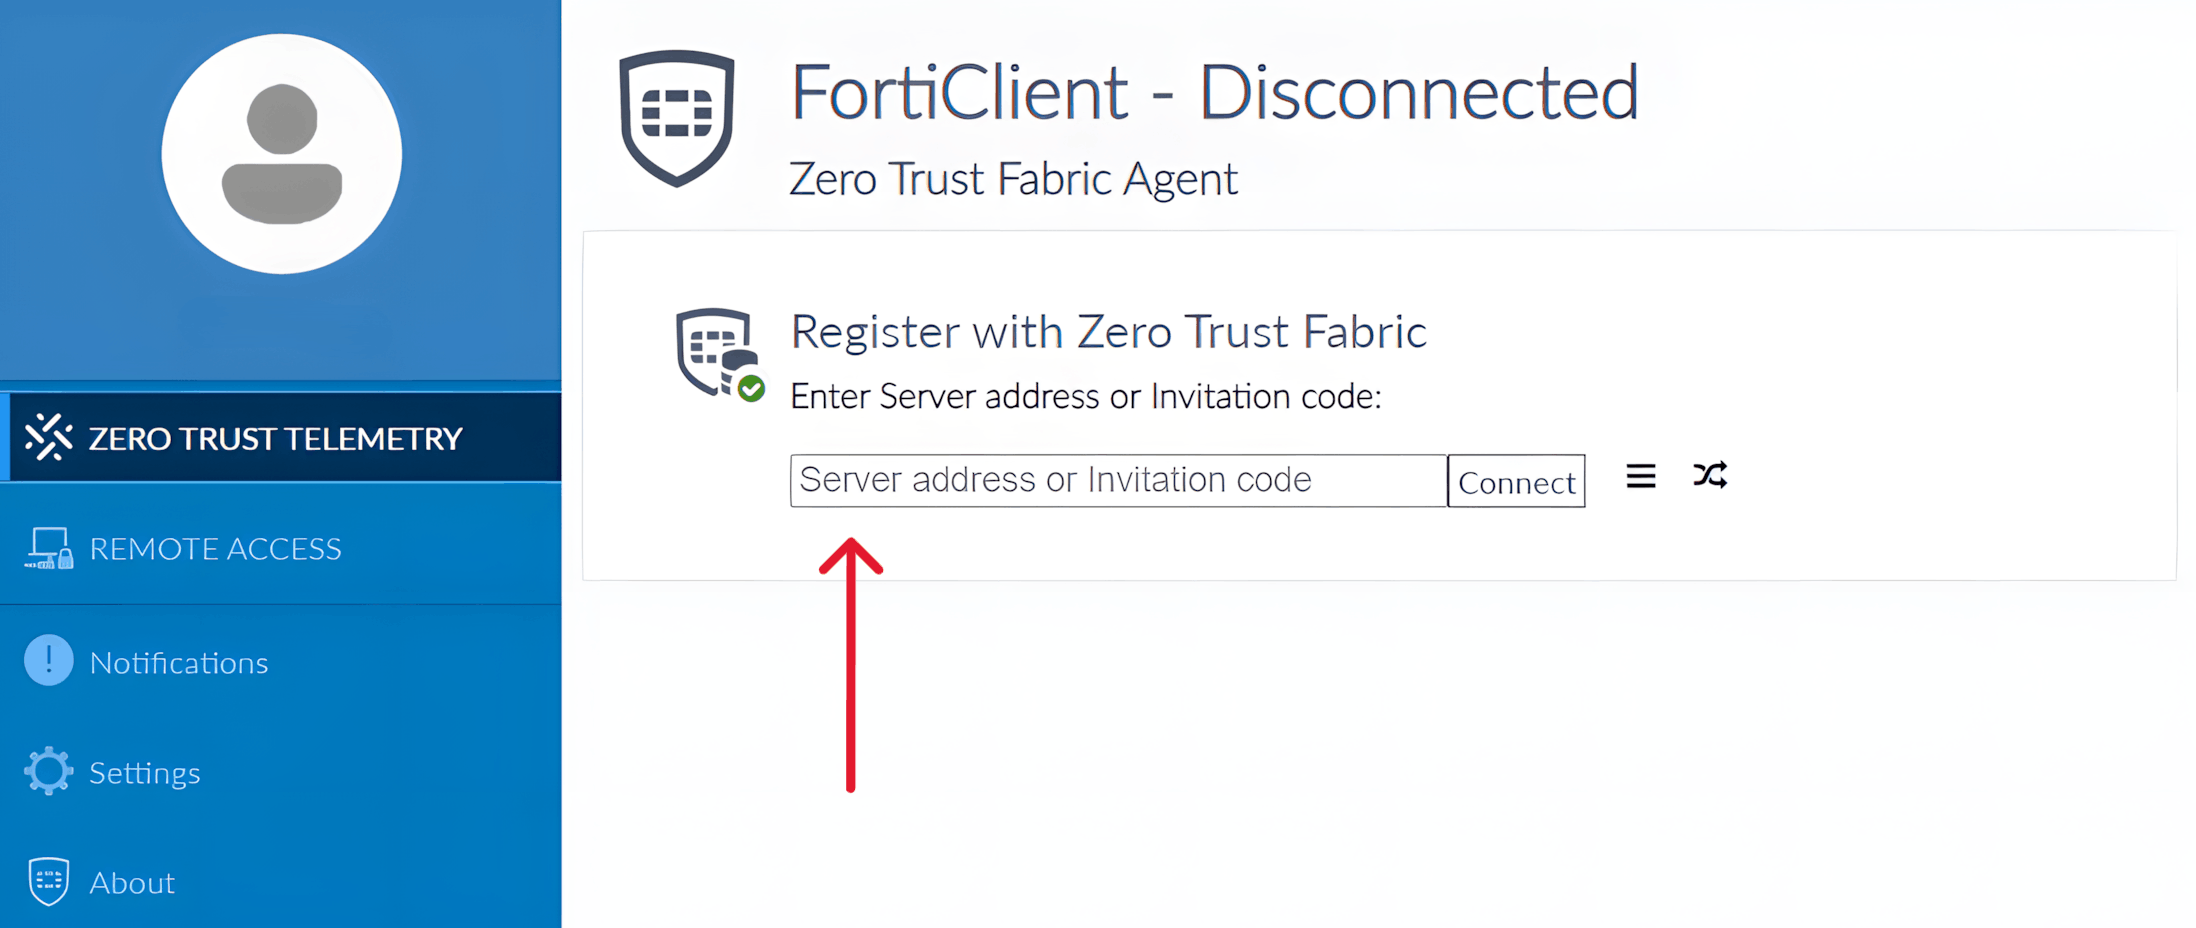
Configuration not loaded (invitation code)
In some cases, the pre-configuration is not loaded automatically and FortiClient shows the field “server address or invitation code”. In this case, go to the Zero Trust Telemetry section, enter fems.units.it in the dedicated field, and click Connect. The client will download the configuration from the University and, after a few minutes, the Remote Access tab will appear with the VPN already configured.
macOS
📥 Download: FortiClient macOS (.dmg)
The package already includes the configuration for the University of Trieste. Open the .dmg file and complete the installation by following the guided procedure.
When finished, open FortiClient, select the UniTS VPN connection, enter your credentials in the format <username>@ds.units.it, and click Connect. If everything works correctly, you can stop here.
Enabling network extensions (if the VPN does not connect)
If macOS shows an authorization request or the VPN does not start, you need to manually enable the Fortinet extensions. Go to System Settings → General → Login Items & Extensions.

Scroll down to the Extensions section and open the details for Network Extensions.
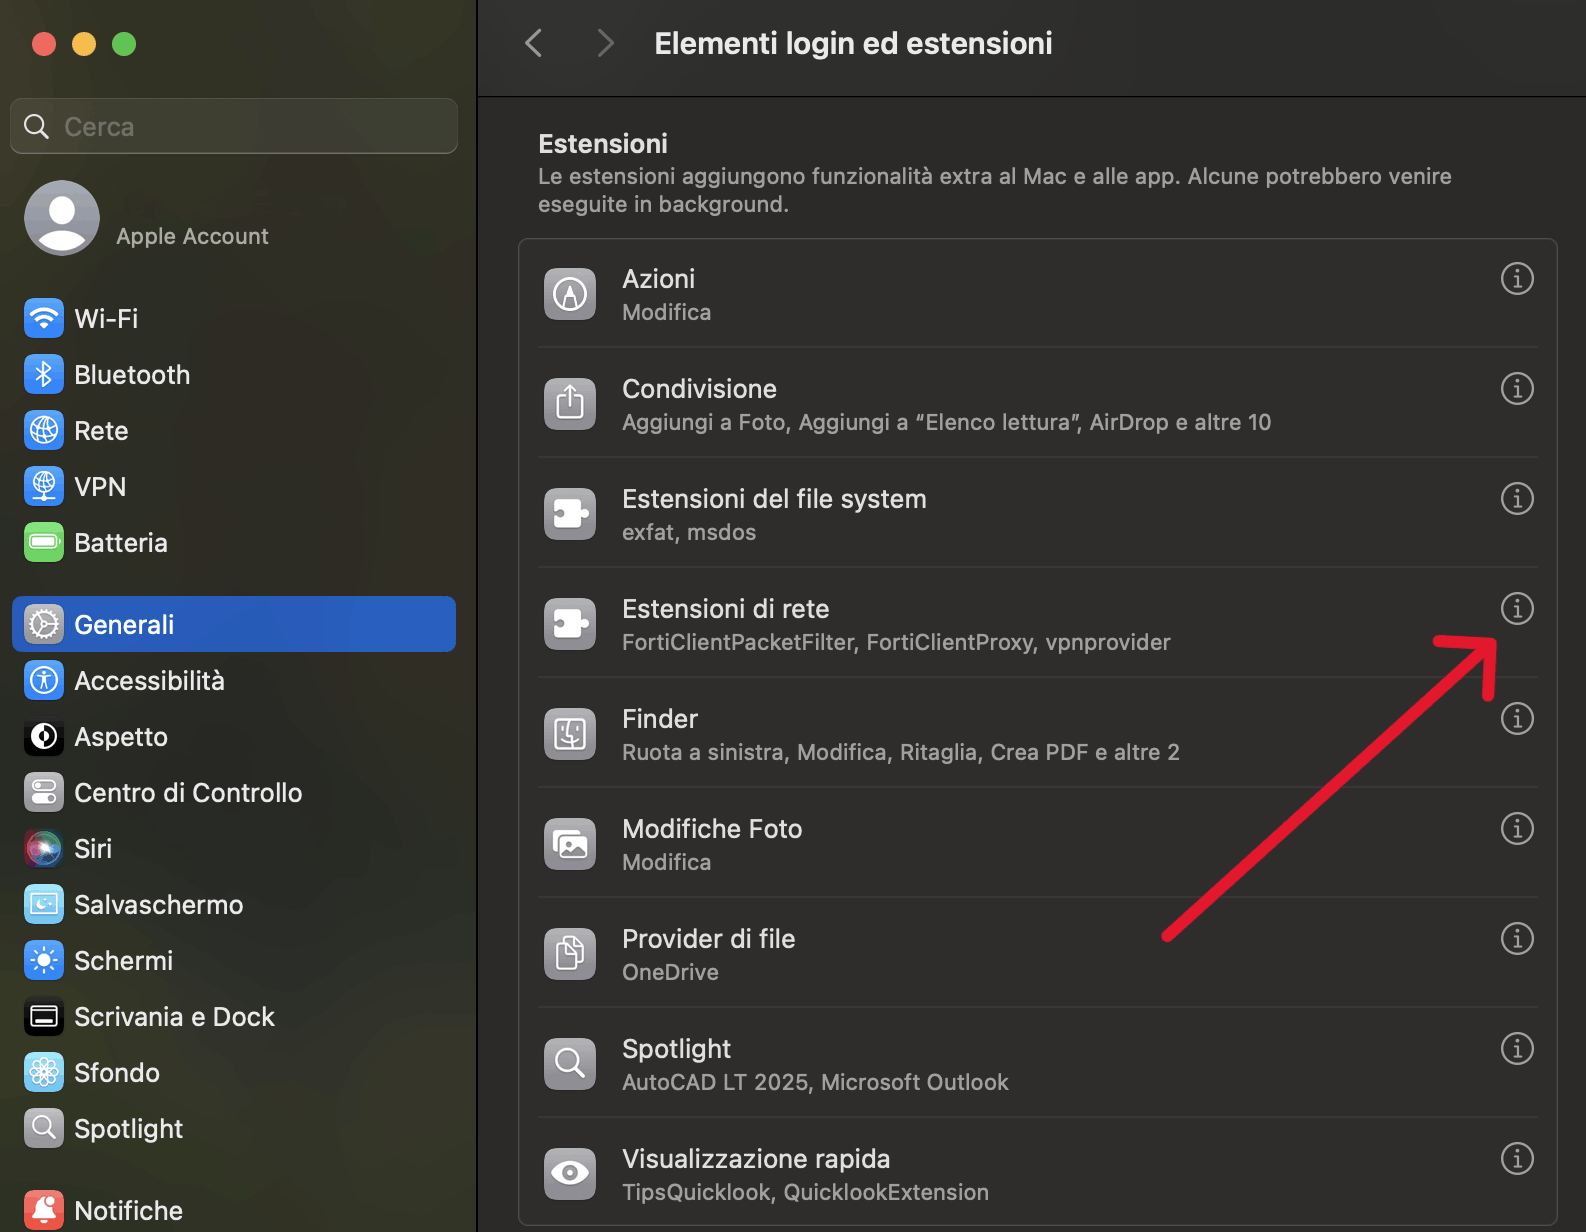
Enable FortiTray, FortiClientNetwork, and FortiClientProxy.
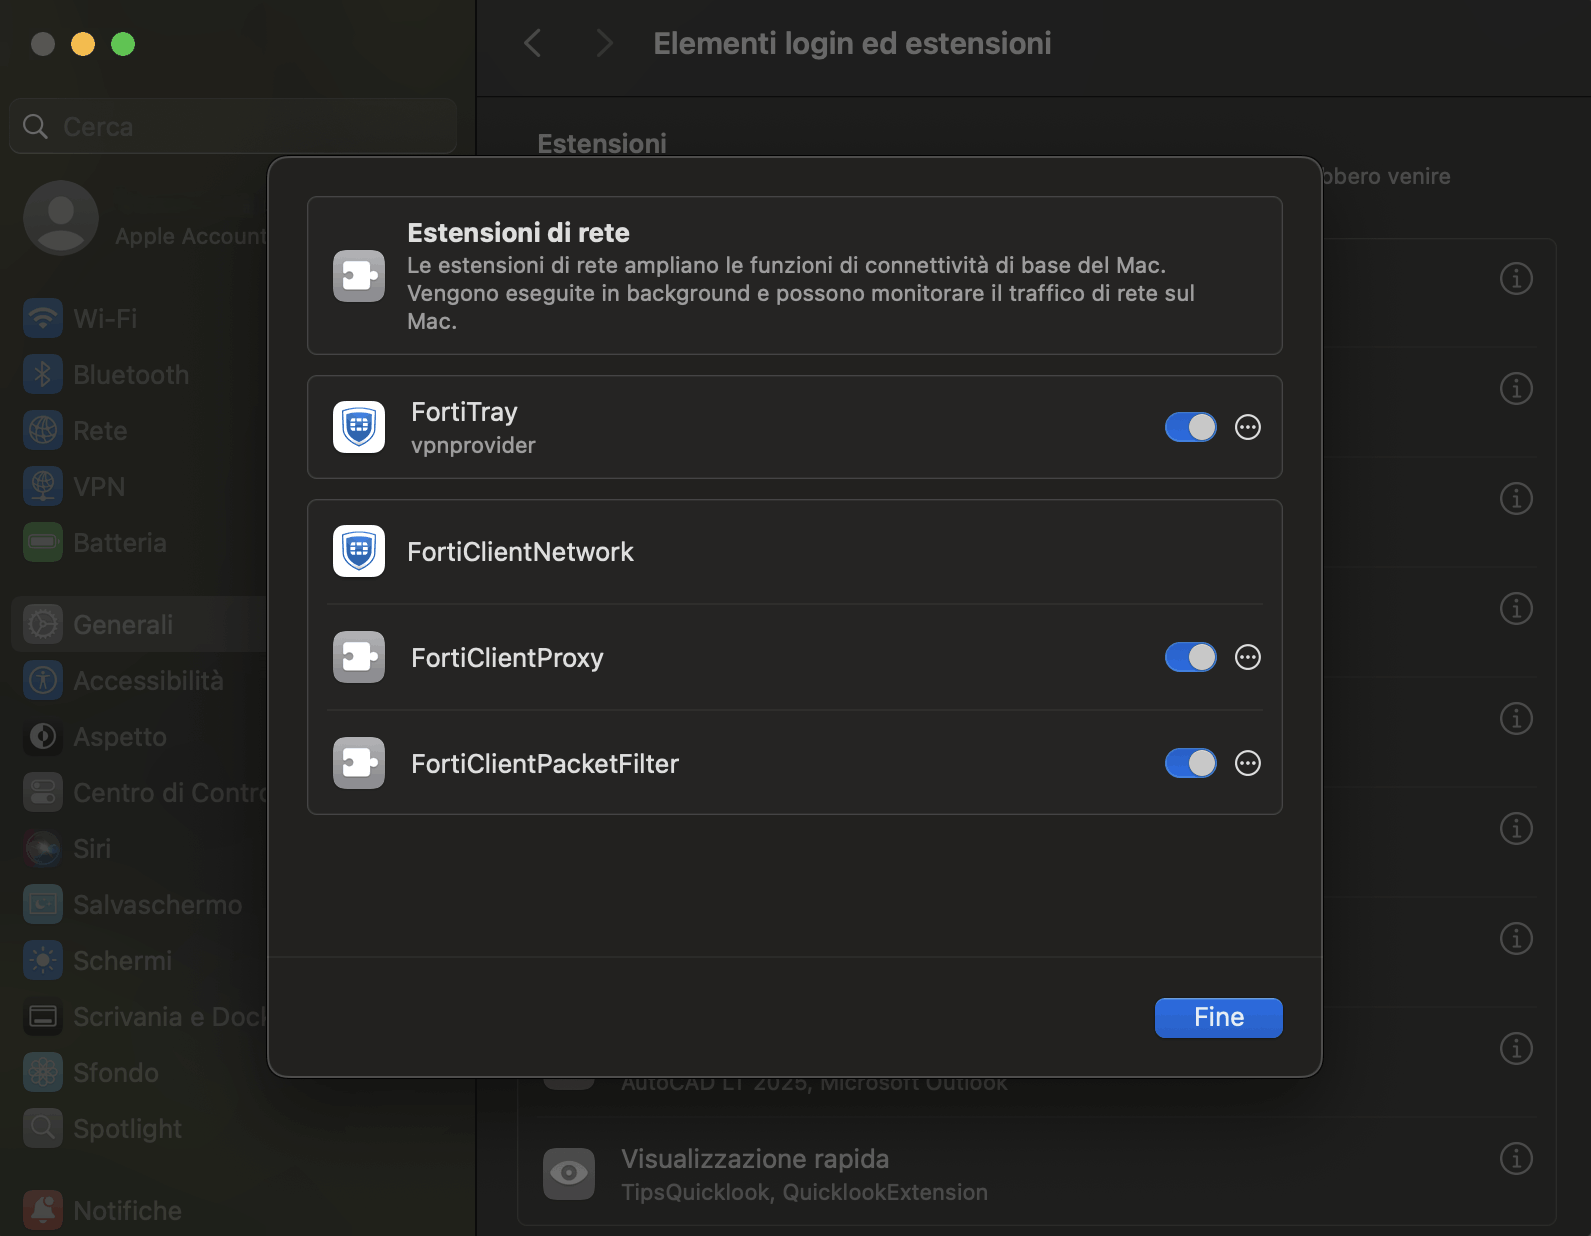
Reopen FortiClient and try connecting again. On university-managed computers (centrally managed), some permissions may require administrator privileges. If the extensions do not appear or remain disabled, remove and reinstall FortiClient: macOS will prompt the authorization request again.
iOS (iPhone / iPad)
📥 Download: FortiClient VPN on the App Store
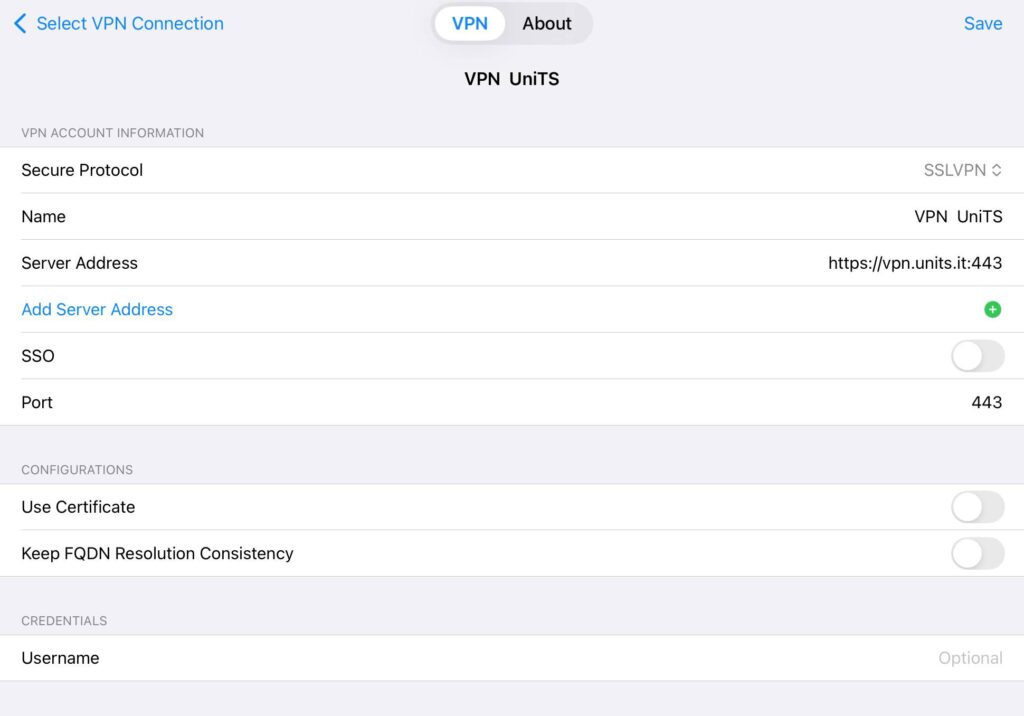
On iOS, the configuration must be entered manually. Install the app, grant the required permissions, then create a new connection with these parameters:
- Secure Protocol: SSLVPN
- Name: as you prefer (e.g., UniTS VPN)
- Server:
vpn.units.it - Port:
443
Tap Save in the top-right corner to save the profile.
Go back to the main screen, enable the Connect switch, and enter your credentials in the format <username>@ds.units.it. If the “Add VPN Configurations” pop-up appears, tap Allow and confirm with passcode, Face ID, or Touch ID.
Android
📥 Download: FortiClient VPN on Google Play
On Android, the configuration must be entered manually. Install the app, grant the required permissions, then create a new SSLVPN connection with these parameters:
- Server:
vpn.units.it - Port:
443
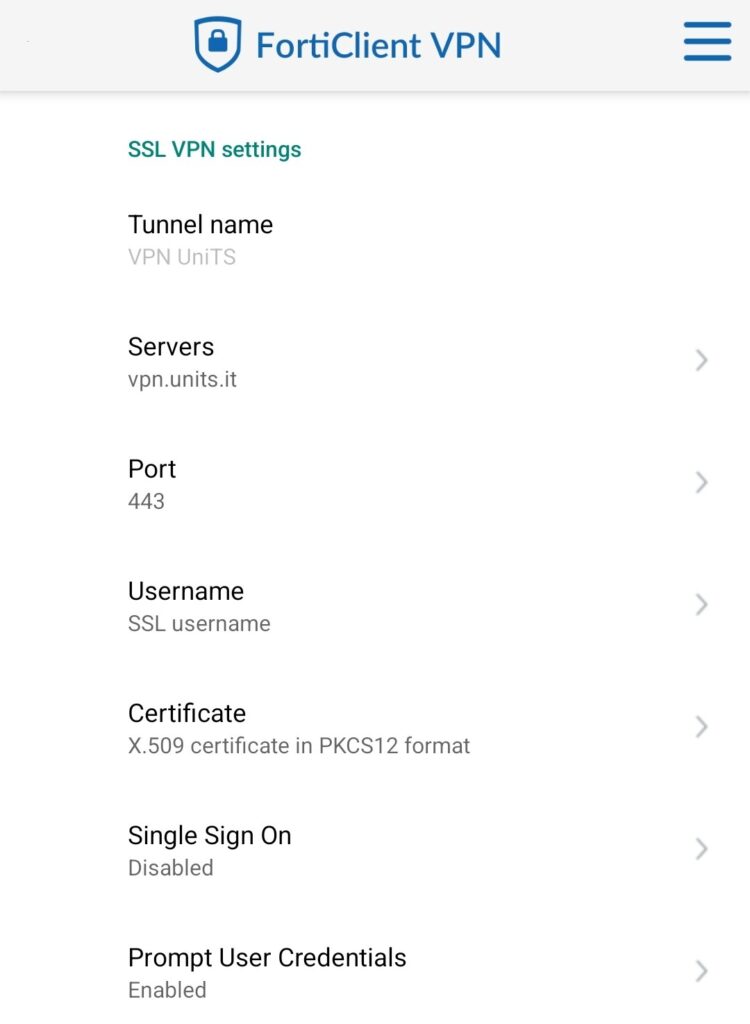
Open the VPN section, enter your credentials in the format <username>@ds.units.it, and tap Connect. If Android shows a confirmation request to add a VPN connection, tap OK / Allow.
Linux
On Linux, installation is done via the official Fortinet repository. Packages are available for x86_64/amd64 architecture: on ARM devices the procedure may not be applicable.
Debian and Ubuntu 22.04 or later
1) Install prerequisites:
sudo apt update
sudo apt install -y ca-certificates curl gnupg
2) Import the Fortinet repository key:
curl -fsSL https://repo.fortinet.com/repo/forticlient/7.2/debian/DEB-GPG-KEY | sudo gpg --dearmor -o /usr/share/keyrings/repo.fortinet.com.gpg3) Add the repository:
echo "deb [arch=amd64 signed-by=/usr/share/keyrings/repo.fortinet.com.gpg] https://repo.fortinet.com/repo/forticlient/7.2/debian/ stable non-free" | sudo tee /etc/apt/sources.list.d/forticlient.list > /dev/null4) Update the package list and install FortiClient:
sudo apt update
sudo apt install forticlient
Red Hat and Rocky Linux
sudo dnf install -y dnf-plugins-core
sudo dnf config-manager --add-repo https://repo.fortinet.com/repo/forticlient/7.2/centos/8/os/x86_64/fortinet.repo
sudo dnf install -y forticlient
Fedora 40 or earlier
sudo dnf config-manager --add-repo https://repo.fortinet.com/repo/forticlient/7.2/centos/8/os/x86_64/fortinet.repo
sudo dnf install forticlient
Fedora 41 or later
sudo dnf config-manager addrepo --from-repofile=https://repo.fortinet.com/repo/forticlient/7.2/centos/8/os/x86_64/fortinet.repo
sudo dnf install forticlient
Configuration (all distributions)
Start FortiClient from the applications menu or from a terminal with the command forticlient.
If the client requires pairing with Zero Trust Telemetry, enter fems.units.it in the EMS field and click Connect. If a certificate warning appears, click Accept.

Once the configuration is loaded, go to Remote Access, select the UniTS VPN connection, enter your credentials in the format <username>@ds.units.it, and click Connect.
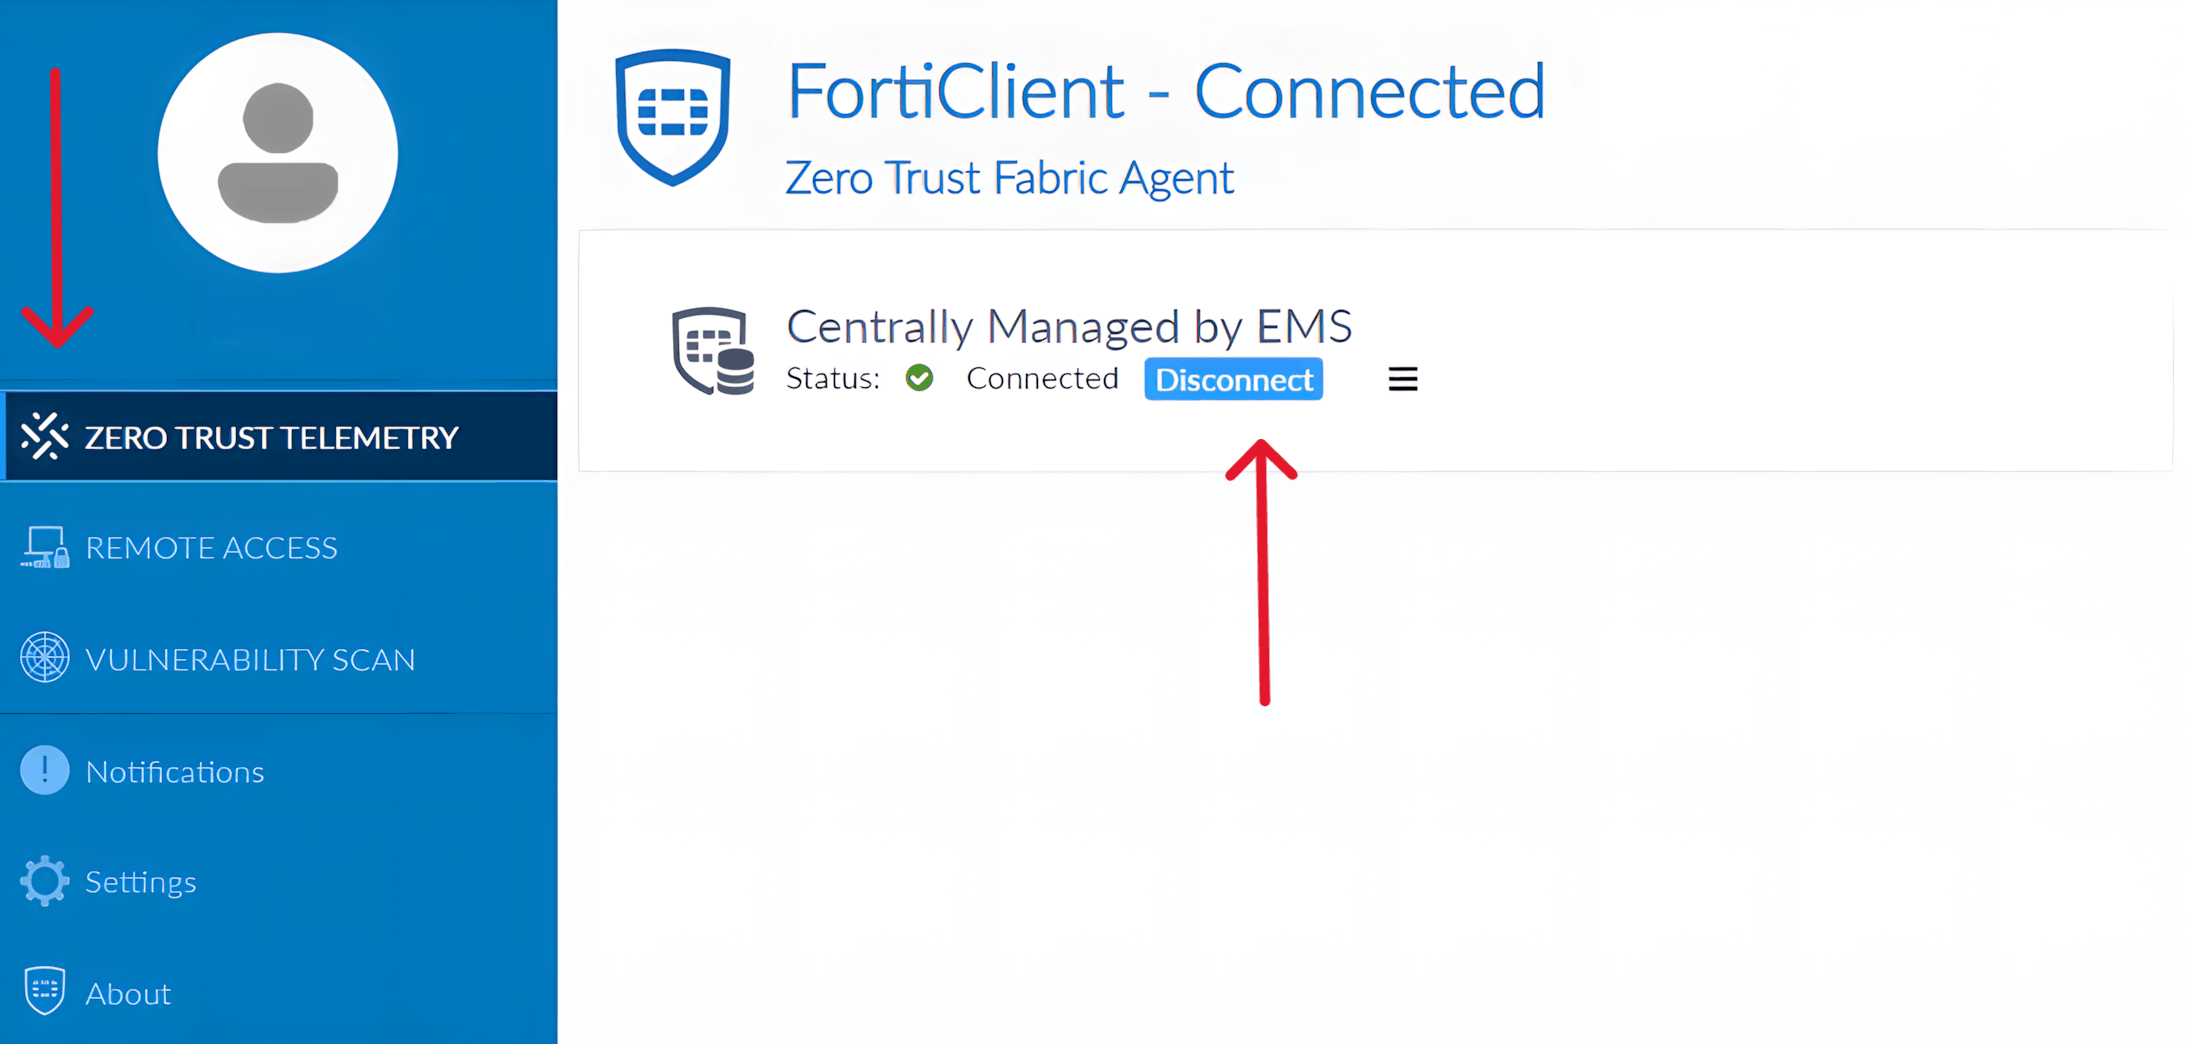
Uninstallation
Before uninstalling FortiClient, you must disconnect from the Zero Trust Telemetry association. Open the Zero Trust Telemetry tab and click Disconnect; only after that will it be possible to proceed with the standard uninstallation process for your operating system.